DIY Tips For Cleaning And Maintaining Your Chandelier
Is your chandelier looking a little lackluster and in need of some TLC? We know how important it is to keep this stunning centerpiece sparkling and in top condition. That’s why we’ve compiled a list of easy DIY tips to help you clean and maintain your chandelier, so it can keep shining brightly for years to come. From choosing the right cleaning solution to tackling dust and grime, we’ve got you covered. Let’s get started!

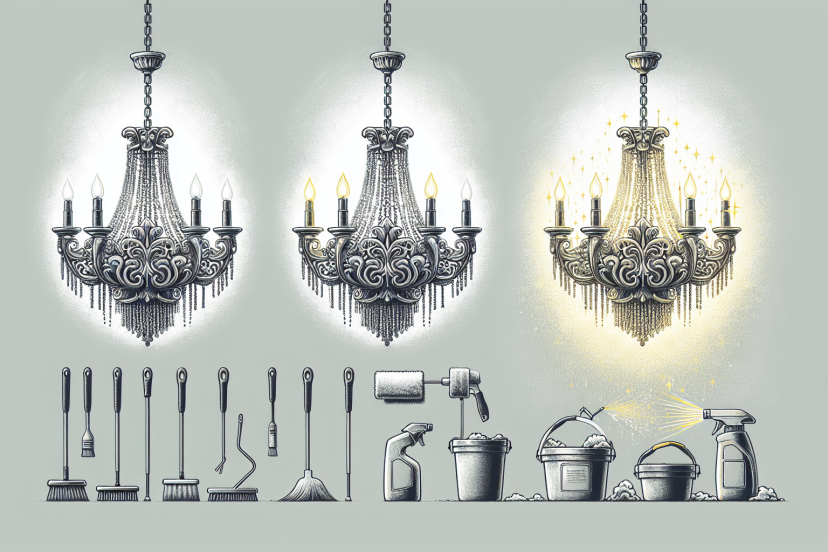
Cleaning
Dusting the Chandelier
Cleaning and maintaining your chandelier is essential to keep it looking its best and to prolong its lifespan. One of the most important steps in chandelier cleaning is dusting. Dust and dirt can quickly accumulate on the chandelier, dulling its shine and reducing its overall beauty. To dust the chandelier, start by turning off the power to avoid any accidental shocks. Then, using a soft, dry cloth or a feather duster, gently wipe away the dust from each individual piece of the chandelier. Take care not to apply too much pressure as delicate glass or crystal pieces can easily break.
Cleaning the Glass or Crystal Pieces
The glass or crystal pieces of your chandelier require regular cleaning to remove any dirt or smudges that may have accumulated over time. To clean these pieces, first, prepare a mixture of warm water and mild dish soap in a bucket or basin. Dip a soft cloth or sponge into the soapy solution, wring out any excess liquid, and gently wipe down each glass or crystal piece. Be sure to cover every surface, paying special attention to hard-to-reach areas. Once cleaned, rinse the pieces with clean water and dry them thoroughly with a soft, lint-free cloth to prevent water spots.
Cleaning the Metal Frame
In addition to the glass or crystal pieces, the metal frame of your chandelier also requires routine cleaning to maintain its shine and elegance. Start by preparing a solution of warm water and mild dish soap in a bucket or basin. Dip a soft cloth or sponge into the soapy mixture, wring out any excess liquid, and carefully wipe down the metal frame. Pay attention to any intricate details or crevices, as dirt can easily accumulate in these areas. For stubborn dirt or grime, you may need to use a toothbrush or soft-bristled brush to scrub gently. Once the frame is clean, rinse it with clean water and dry thoroughly.
Cleaning the Electrical Components
Proper cleaning of the electrical components in your chandelier is crucial for its safe and efficient operation. Before starting any cleaning process, turn off the power to ensure your safety. To clean the electrical components, use a can of compressed air to blow away any dust or debris from the sockets, wires, and other electrical parts. Be sure to hold the can upright and use short, controlled bursts to prevent any liquid from escaping. Additionally, you can use a small, clean brush to dust hard-to-reach areas and remove any stubborn dirt. Regular cleaning of the electrical components will help prevent dust buildup and ensure the longevity of your chandelier.
Replacing Bulbs
Choosing the Correct Bulb Type
When it comes to replacing bulbs in your chandelier, selecting the correct bulb type is essential. Different chandelier models may require specific bulb types, such as incandescent, halogen, or LED bulbs. Consult the manufacturer’s instructions or look for markings on the existing bulbs to determine the appropriate type. It’s crucial to choose bulbs with the correct wattage as exceeding the recommended wattage can cause the bulbs to overheat and potentially damage the chandelier.
Turning Off the Power
Before replacing any bulbs in your chandelier, it is crucial to turn off the power to ensure your safety. Locate the electrical circuit breaker or fuse box and switch off the circuit that supplies power to the chandelier. This step will prevent any accidental shocks or electrical issues while you work on the chandelier.
Removing Burned-Out Bulbs
Once the power is turned off, carefully inspect the bulbs in your chandelier and identify any burned-out ones. To remove burned-out bulbs, gently twist counterclockwise until they loosen and can be pulled out. Take care not to apply excessive force as this may break the bulb or damage the socket.
Installing New Bulbs
After removing the burned-out bulbs, it’s time to install the replacements. Hold the new bulb by the base and align the threads with the socket. Gently push and twist the bulb clockwise until it is securely in place. Be cautious not to overtighten, as this can damage the socket or bulb. Repeat this process for each burned-out bulb until all replacements are installed.
Repairing and Replacing Parts
Identifying Damaged Parts
Over time, chandeliers may experience wear and tear, leading to loose or broken pieces. To repair or replace these damaged parts, it is crucial to identify them first. Carefully inspect your chandelier and look for any loose, broken, or missing pieces. Common areas to check include the metal frame, individual glass or crystal pieces, and electrical components.
Repairing Loose or Broken Pieces
For loose or broken pieces, such as detached crystals or loose metal clasps, you can attempt to repair them yourself. A gentle touch is necessary to avoid causing further damage. Use a strong adhesive specifically designed for glass or metal to reattach loose or broken pieces. Take your time and carefully follow the adhesive manufacturer’s instructions for the best results. Allow the adhesive to dry and set completely before reassembling and reinstalling the repaired parts.
Replacing Missing or Irreparable Parts
In some cases, parts may be missing or too damaged to repair. When this occurs, it is essential to replace those parts. Contact the manufacturer or a reputable chandelier supplier to order the necessary replacement pieces. Provide them with accurate information about your chandelier model and the specific parts you require. Once you receive the replacement parts, follow the manufacturer’s instructions for installation. Take care not to force pieces into place and ensure they fit securely and properly.
Preventing Damage
Regular Maintenance
Regular maintenance is key to preventing damage and extending the lifespan of your chandelier. Set a maintenance schedule to routinely dust, clean, and inspect your chandelier for any signs of wear or damage. By addressing small issues promptly, you can prevent them from becoming larger problems that require extensive repairs or replacements.
Avoiding Harsh Cleaning Products
When cleaning your chandelier, it’s essential to avoid using harsh cleaning products that may damage the delicate materials. Harsh chemicals and abrasive cleaners can cause discoloration, fading, or scratching. Stick to mild dish soap and warm water for cleaning glass or crystal pieces, and avoid any cleaners containing ammonia or bleach.
Ensuring Sturdy Installation
Proper installation is crucial for preventing damage to your chandelier. Make sure the chandelier is securely mounted to prevent it from coming loose or falling. If you’re unsure about the installation process, consult a professional electrician or chandelier installer to ensure it is safely and securely mounted.
Protecting Against Moisture
Moisture can be damaging to chandeliers, especially if they are located in humid areas like bathrooms or kitchens. To protect your chandelier from moisture, ensure proper ventilation in the room and avoid exposing it to direct water contact. If necessary, use a dehumidifier to control the room’s humidity levels.

Professional Cleaning
Assessing the Chandelier’s Condition
While DIY cleaning methods are effective for regular maintenance, there may be instances where professional cleaning is required. If you notice stubborn stains, heavy dirt buildup, or damage beyond your expertise, it may be time to assess the chandelier’s condition and consider professional cleaning services. Some chandeliers, particularly antique or intricate ones, require delicate handling that professionals are trained to provide.
Choosing a Reputable Professional
Selecting a reputable professional to clean your chandelier is crucial to ensure a quality job and prevent any further damage. Seek recommendations from friends, family, or reputable online sources. Look for professionals specializing in chandelier cleaning and repair, and check for reviews or testimonials from previous customers. Additionally, ask about their experience and certifications in handling chandeliers.
Understanding the Cleaning Process
Before hiring a professional, it is important to understand the cleaning process they will use on your chandelier. Ask about the techniques, tools, and cleaning products they employ. Ensure they use methods that are safe for your chandelier’s materials and take precautions to prevent any damage during the cleaning process.
Determining the Cost
When considering professional cleaning services, it’s essential to determine the cost involved. Request quotes from multiple professionals and compare their prices and services offered. Keep in mind that the cost may vary based on the size, style, and condition of your chandelier. Consider the expertise and reputation of the professional alongside the cost to make an informed decision.
Safety Precautions
Turning Off the Power
Safety should always be a top priority when working with chandeliers. Whenever you perform any cleaning, bulb replacement, or repair tasks, remember to turn off the power beforehand. Locate the circuit breaker or fuse box and switch off the circuit supplying power to the chandelier. This precautionary step ensures your safety from accidental electric shocks.
Using a Sturdy Ladder or Scaffold
When cleaning or maintaining your chandelier, it’s important to use a sturdy and stable ladder or scaffold. A wobbly or unstable support can lead to accidents and injuries. Ensure the ladder or scaffold is properly set up on a level surface and follow the manufacturer’s instructions for safe usage.
Protecting Yourself
While working on your chandelier, protect yourself by wearing appropriate safety gear. Safety glasses or goggles will shield your eyes from falling debris, and gloves can provide additional protection for your hands. Additionally, consider wearing a dust mask to prevent the inhalation of any airborne dust particles.
Working in a Well-Lit Area
Having proper lighting is crucial to ensure your safety and the accuracy of your work. Work in a well-lit area to clearly see the chandelier and any potential hazards. Adequate lighting will help you identify damaged parts, clean more effectively, and perform repairs with precision.
Step-by-Step Cleaning Guide
Gather the Necessary Supplies
Before starting the cleaning process, gather all the necessary supplies. You will need a soft, dry cloth or feather duster for dusting, a bucket or basin for preparing the cleaning solution, mild dish soap, a sponge, a second soft cloth or lint-free towel for drying, and a can of compressed air for cleaning the electrical components.
Prepare the Area
Ensure the area around the chandelier is clear of any furniture or obstacles. Lay down a drop cloth or plastic sheeting to protect the floor or furniture from potential cleaning solution drips or debris.
Dust the Chandelier
Start by dusting the chandelier using a soft, dry cloth or a feather duster. Begin at the top and work your way down, gently wiping each individual piece of the chandelier to remove dust and dirt.
Clean the Glass or Crystal Pieces
Prepare a solution of warm water and mild dish soap in a bucket or basin. Dip a soft cloth or sponge into the soapy mixture, wring out any excess liquid, and gently wipe down each glass or crystal piece, ensuring you cover the entire surface. Rinse the pieces with clean water and dry thoroughly with a soft, lint-free cloth to prevent water spots.
Clean the Metal Frame
Using the same warm water and mild dish soap solution, dip a soft cloth or sponge into the mixture and carefully wipe down the metal frame of the chandelier. Pay attention to any intricate details or crevices, and use a toothbrush or soft-bristled brush for stubborn dirt or grime. Rinse the frame with clean water and dry it thoroughly.
Clean the Electrical Components
Before cleaning the electrical components, turn off the power to ensure your safety. Use a can of compressed air to blow away any dust or debris from the sockets, wires, and other electrical parts. Use a small, clean brush to dust hard-to-reach areas and remove any stubborn dirt. Regular cleaning of the electrical components will prevent dust buildup and keep your chandelier functioning properly.
Step-by-Step Bulb Replacement Guide
Choose the Correct Bulb Type
Start by determining the correct bulb type for your chandelier. Refer to the manufacturer’s instructions or markings on the existing bulbs. Select bulbs with the appropriate wattage to prevent overheating and potential damage.
Turn Off the Power
Before replacing any bulbs, turn off the power to the chandelier to ensure your safety. Locate the electrical circuit breaker or fuse box and switch off the circuit supplying power to the chandelier.
Remove Burned-Out Bulbs
Once the power is off, identify the burned-out bulbs and gently twist them counterclockwise until they loosen. Carefully pull them out of the socket, taking care not to break the bulb or damage the socket.
Install New Bulbs
Take the new bulbs and hold them by the base. Align the threads of the bulb with the socket and gently push and twist them clockwise until they are securely in place. Avoid overtightening, as this can damage the socket or bulb.
Turn On the Power
After replacing all the burned-out bulbs, turn on the power to the chandelier by flipping the circuit breaker or fuse switch back to the “on” position. Ensure all bulbs are properly illuminated, and test the chandelier to ensure it is functioning correctly.
Step-by-Step Repair Guide
Identify Damaged Parts
Carefully inspect your chandelier to identify any loose, broken, or missing parts. Look for detached crystals, loose metal clasps, or damaged electrical components. Take note of the specific areas and pieces that require repair.
Repair Loose or Broken Pieces
For loose or broken pieces, use a strong adhesive designed for glass or metal to reattach them. Follow the adhesive manufacturer’s instructions for the best results. Allow the adhesive to dry and set completely before reassembling and reinstalling the repaired parts.
Replace Missing or Irreparable Parts
In cases where parts are missing or too damaged to repair, contact the manufacturer or a reputable chandelier supplier to order the necessary replacement pieces. Provide accurate information about your chandelier model and the specific parts you require. Follow the manufacturer’s instructions for installation and ensure the replaced parts fit securely and properly.
Maintenance Schedule
Weekly Maintenance
Performing weekly maintenance on your chandelier will help keep it in top condition. Dust the chandelier using a soft, dry cloth or a feather duster to remove any surface dust or dirt. Check for loose or broken pieces and repair them promptly.
Monthly Maintenance
Once a month, perform a deeper cleaning of your chandelier. Dust the chandelier thoroughly, including individual glass or crystal pieces and the metal frame. Clean the glass or crystal pieces with a mild dish soap and warm water solution, rinse, and dry them carefully. Additionally, use compressed air to blow away dust or debris from the electrical components.
Annual Maintenance
At least once a year, schedule a professional cleaning and inspection for your chandelier. Professionals can perform a more comprehensive cleaning, assess the condition of your chandelier, and address any potential issues. This annual maintenance helps prevent major damage and ensures your chandelier remains in optimal condition for years to come.
Taking care of your chandelier through regular cleaning, proper bulb replacement, repair, and maintenance will not only keep it looking beautiful but also prolong its lifespan. By following these DIY tips and investing in professional cleaning when necessary, you can enjoy the elegance and charm of your chandelier for years to come.