Beginner’s Guide To Setting Up Outdoor Surveillance Cameras
So you’re ready to take the first step towards securing your property and keeping an eye on the things that matter most to you? Look no further than this handy Beginner’s Guide to Setting Up Outdoor surveillance cameras. Whether you’re concerned about vandalism, theft, or simply want to keep tabs on your loved ones, this article will equip you with the knowledge and confidence to set up your very own outdoor surveillance system. From choosing the right camera to positioning it strategically, we’ll take you through the essential steps, making the process easy and stress-free. Say goodbye to security worries and hello to peace of mind with our comprehensive guide.
Choosing the Right Outdoor Surveillance Camera
When it comes to choosing the right outdoor surveillance camera, there are a few factors you should consider before making your decision.
Consider the Purpose of Surveillance
Before you start shopping for a surveillance camera, it’s important to determine the purpose of your surveillance. Are you looking to monitor your home, office, or a specific area? Are you trying to deter potential burglars or keep an eye on your property while you’re away? Understanding your surveillance needs will help you select the appropriate camera that meets your requirements.
Determine the Desired Coverage Area
Another important factor to consider is the coverage area that you want to monitor. Do you need a camera that covers a wide area, such as your backyard or parking lot? Or do you just need a camera that focuses on a specific entry point, like your front door? By determining the desired coverage area, you can narrow down your options and choose a camera with the appropriate field of view.
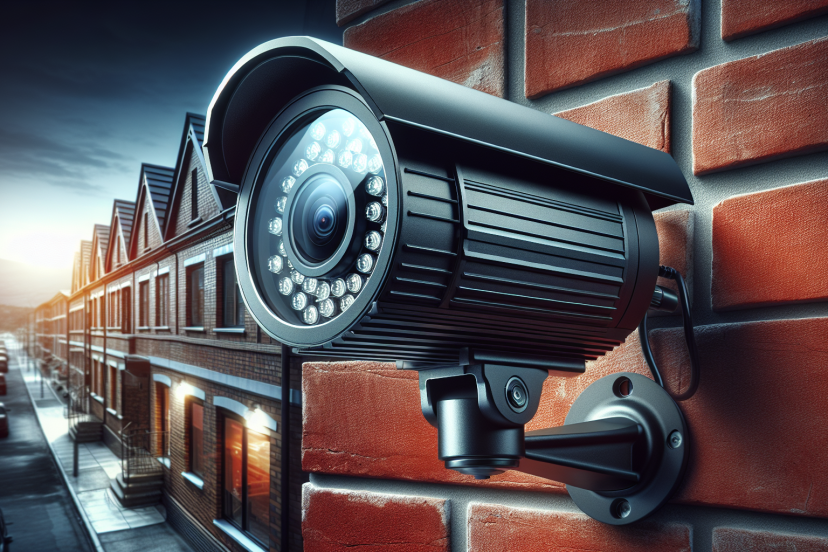
Select the Appropriate Camera Type
There are various types of outdoor surveillance cameras available in the market, each with its own features and benefits. The most common types include bullet cameras, dome cameras, and PTZ (pan-tilt-zoom) cameras. Bullet cameras are typically weatherproof and offer a fixed view, making them ideal for monitoring specific outdoor areas. Dome cameras are designed to be discreet and can be mounted on ceilings or walls. PTZ cameras, on the other hand, provide flexible viewing options as they can pan, tilt, and zoom, allowing you to monitor a larger area. Consider your specific needs and choose the camera type that best fits your requirements.
Decide on Wired or Wireless Cameras
When it comes to outdoor surveillance cameras, you also need to decide whether you want to go with wired or wireless cameras. Wired cameras require a physical connection to a power source and a wired connection to a network or recording device. They can provide a more reliable and stable connection but require professional installation. On the other hand, wireless cameras are easy to install and provide flexibility in terms of camera placement. They rely on Wi-Fi connections and are powered by batteries or solar panels. Consider your preferences and the specific requirements of your surveillance system when deciding between wired and wireless cameras.
Deciding on Camera Placement
Once you have chosen the right outdoor surveillance cameras, the next step is to determine the optimal camera placement for effective monitoring.
Identify Vulnerable Areas
To ensure maximum coverage and protection, it is crucial to identify the vulnerable areas of your property. These are the areas where potential intruders are more likely to target, such as windows, doors, backyards, or blind spots. By placing cameras in these vulnerable areas, you can significantly enhance the security of your property.
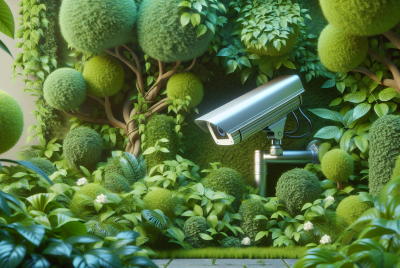
Consider Line of Sight
When determining camera placement, it is essential to consider the line of sight. You want to make sure that the cameras have an unobstructed view of the areas you wish to monitor. Avoid placing cameras behind thick bushes or trees that may obstruct the field of view. Additionally, consider the angle and elevation of the camera to optimize the coverage and minimize blind spots.
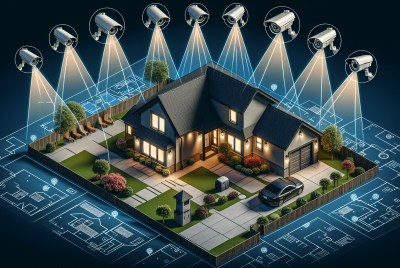
Use Multiple Camera Angles
For comprehensive outdoor surveillance, using multiple camera angles is highly recommended. By strategically placing cameras at different angles, you can capture a wider range of views and reduce any potential blind spots. This approach ensures that you have complete coverage and can monitor every corner of your property effectively.
Ensure Adequate Lighting
Lighting plays a crucial role in outdoor surveillance. It is important to ensure that there is adequate lighting in the areas you wish to monitor. Well-lit areas deter potential intruders and allow for clearer video footage. Consider installing additional lighting fixtures or choose cameras with built-in infrared or low-light capabilities to capture high-quality images in low-light conditions.

Preparing for Installation
Before installing your outdoor surveillance system, there are a few key steps you should take to ensure a smooth and successful installation process.
Check Local Laws and Regulations
Before installing surveillance cameras, it is crucial to familiarize yourself with local laws and regulations regarding their use. Different jurisdictions may have specific rules regarding camera placement, privacy concerns, and recording audio. Make sure you comply with all legal requirements to avoid any legal issues down the line.
Ensure Sufficient Power Supply
One of the most important considerations for outdoor surveillance cameras is ensuring a sufficient power supply. Wired cameras require a reliable power source, so make sure you have access to electrical outlets in the desired camera locations. If using wireless cameras, consider the battery life or opt for solar-powered cameras to ensure continuous operation.
Consider Weatherproofing Options
Outdoor surveillance cameras are exposed to the elements, so it’s crucial to choose weatherproof cameras and consider additional weatherproofing options. Look for cameras with an IP65 or higher rating to ensure protection against dust, rain, and extreme temperatures. Additionally, consider using protective enclosures or housing for extra protection against harsh weather conditions.
Select the Right Mounting Equipment
To ensure secure installation and stable camera positioning, it is important to select the right mounting equipment. Different camera types may require specific mounting options such as wall mounts, pole mounts, or ceiling mounts. Consider the materials and structures of your property to choose appropriate mounting equipment that will withstand the outdoor environment.
Installing the Surveillance System
Once you have prepared for installation, it’s time to install your outdoor surveillance system. Follow these steps to ensure a successful and effective installation process.
Mounting the Cameras
Start by mounting the cameras in the predetermined locations. Use the appropriate mounting equipment and ensure that the cameras are securely attached. Follow the manufacturer’s instructions for proper installation and make sure the cameras are level and positioned correctly for optimal coverage.
Connecting the Cameras to Power
If using wired cameras, connect the cameras to a reliable power source using the provided power cables. Ensure that the power cables are properly secured to prevent accidental disconnection. If using wireless cameras, follow the manufacturer’s instructions for battery installation or solar panel setup.
Running the Video Cables
For wired cameras, run the video cables from the cameras to the designated recording or monitoring device. Conceal the cables as much as possible to prevent tampering or damage. If using wireless cameras, no video cables are required, but ensure a strong and stable Wi-Fi connection is available.
Positioning and Adjusting the Cameras
Once the cameras are mounted and connected, adjust their positions and angles to cover the desired areas. Use the camera’s settings or a monitoring software to adjust the field of view, zoom level, and focus for optimal video quality. Regularly check the cameras and make any necessary adjustments to ensure proper monitoring and coverage.

Setting Up Network and Remote Access
To fully utilize your outdoor surveillance system, it’s important to set up network and remote access for convenient monitoring and management.
Choose Network Connection Options
Decide how you want to connect your surveillance cameras to the network. You can either use a wired Ethernet connection for maximum stability and reliability or rely on Wi-Fi for wireless connectivity. Consider the distance between the cameras and the network router and choose the appropriate connection method to ensure a strong and stable network connection.
Configure the Cameras for Network Access
Once connected to the network, you need to configure the cameras for network access. This typically involves accessing the camera’s settings through a web browser and entering the network information, such as the IP address, subnet mask, gateway, and DNS settings. Follow the manufacturer’s instructions or consult the camera’s user manual for specific configuration steps.
Set Up Port Forwarding
Port forwarding allows you to access your surveillance system remotely over the internet. Configure your network router to forward the necessary ports to the IP addresses of your cameras. This will enable you to view live or recorded video footage from your surveillance system on your mobile device or computer, even when you’re away from home.
Install and Configure Remote Viewing Software
To access your surveillance system remotely, you will need to install and configure remote viewing software on your mobile device or computer. Follow the instructions provided by the manufacturer to download and set up the software. Enter the necessary network and login information to establish a connection with your surveillance system and start monitoring from anywhere.
Configuring Camera Settings
To optimize your outdoor surveillance system, it’s important to configure the camera settings according to your specific preferences and requirements.
Adjusting Camera Resolution and Frame Rate
Camera resolution and frame rate directly impact the quality and smoothness of the video footage. Higher resolutions and frame rates result in clearer and more detailed images but may require more storage space. Consider the balance between image quality and storage capacity to choose the optimal settings for your surveillance needs.
Setting Up Motion Detection
Motion detection allows your surveillance system to capture and record video footage only when there is movement in the monitored areas, saving storage space and reducing false alarms. Configure the sensitivity level and detection area of the motion detection feature to ensure accurate and reliable motion detection.
Enabling Night Vision
If you want to monitor your property during nighttime or low-light conditions, make sure to enable the night vision feature on your cameras. Many outdoor surveillance cameras come with built-in infrared LEDs that provide clear and detailed images in complete darkness. Adjust the infrared sensitivity and range to optimize the night vision capabilities of your cameras.
Configuring Recording Options
Decide how you want your surveillance system to record video footage. You can choose continuous recording, where the cameras record footage 24/7, or schedule recording during specific times. You can also set up motion-triggered recording, where the cameras only record when motion is detected. Adjust the recording settings according to your surveillance needs and available storage capacity.
Securing and Maintaining the System
To prevent unauthorized access and ensure the longevity of your outdoor surveillance system, it’s important to implement security measures and perform routine maintenance.
Change Default Passwords
Immediately change the default passwords of your surveillance cameras and any associated software or apps. Use strong, unique passwords that are not easily guessable to prevent unauthorized access to your system.
Enable Encryption and Authentication
Ensure that your surveillance system uses encryption and authentication protocols to secure the video footage and prevent unauthorized interception. Use protocols such as HTTPS and SSL/TLS to secure the communication between your cameras and viewing devices.
Regularly Update Firmware
Keep your surveillance system up to date by regularly checking for firmware updates from the manufacturer. Firmware updates often include bug fixes, security enhancements, and new features that can improve the performance and security of your cameras.
Perform Routine Maintenance
Regularly inspect and clean your surveillance cameras to ensure optimal performance. Check for any physical damage, loose connections, or signs of tampering. Clean the camera lenses and housings to maintain clear image quality. Additionally, regularly check the storage capacity of your recording device and delete old footage to free up space for new recordings.
Monitoring and Managing the Surveillance System
Once your outdoor surveillance system is up and running, you can monitor and manage it effectively using various tools and features.
Creating and Managing User Accounts
Control access to your surveillance system by creating and managing user accounts. Assign different levels of access to different users, such as administrators, operators, or viewers. This allows you to control who can view live or recorded video footage and perform system configurations.
Accessing Live and Recorded Video
With remote access set up, you can easily access live and recorded video footage from your surveillance system. Use the remote viewing software or mobile apps to monitor your property in real-time or review past events. Take advantage of features such as timeline navigation, video playback, and digital zoom to quickly find and view specific incidents.
Setting Up Alerts and Notifications
Configure alerts and notifications to receive instant updates about any suspicious activity on your property. Set up motion detection alerts, email notifications, or push notifications to stay informed of any potential security breaches. This allows you to take immediate action and alert the authorities if necessary.
Backing up Video Footage
To ensure the preservation of important video footage, implement a regular backup system. This can involve automatically backing up recorded videos to an external storage device, cloud storage service, or a dedicated network video recorder (NVR). Regularly test the backup system to ensure the integrity and accessibility of the video footage.
Troubleshooting Common Issues
Even with a well-planned surveillance system, you may encounter common issues that require troubleshooting. Here are some solutions to common problems you may face:
Camera Connectivity Problems
If your cameras are not connecting or experiencing intermittent connectivity issues, check the network connection and make sure the cameras are within range of the Wi-Fi signal. Verify that the network settings on the cameras are correct and check for any wireless interference or signal blockage. Resetting the cameras or rebooting the network router may also help resolve connectivity issues.
Poor Video Quality
If you are experiencing poor video quality, check the camera lens for any dirt, smudges, or condensation that may be affecting the image clarity. Adjust the focus and aperture settings to optimize the image quality. If the video quality remains poor, consider upgrading to cameras with higher resolution or better image sensors.
False Motion Detection Alerts
To reduce false motion detection alerts, adjust the sensitivity level and detection area of the motion detection feature. Avoid pointing the cameras towards areas with moving trees, branches, or other objects that may trigger false alarms. Consider using advanced motion detection algorithms that can distinguish between human movement and other types of motion.
Network and Remote Access Issues
If you’re experiencing network or remote access issues, ensure that your network router has a stable internet connection and that the necessary ports are properly forwarded. Double-check the network configuration settings on both the cameras and the viewing devices. Restarting the network devices and reinstalling the remote viewing software may resolve any connectivity issues.
Enhancing Outdoor Surveillance System
Once you have set up your outdoor surveillance system, you can further enhance its capabilities by incorporating additional features and technologies.
Integrating with Other Security Devices
Integrate your surveillance system with other security devices, such as alarm systems, motion sensors, or smart locks. This allows for a comprehensive security solution that can trigger alerts, activate recording, or lock doors in response to specific events. Ensure compatibility between the different devices and configure them to work together seamlessly.
Using Cloud Storage and Remote Backup
Consider utilizing cloud storage services for storing your video footage. Cloud storage provides secure and off-site storage, eliminating the risk of losing recordings due to physical damage or theft. Additionally, set up automatic backups to remote servers or external hard drives to ensure redundancy and quick data recovery in case of any system failures.
Installing a Video Management System
For larger surveillance systems or more advanced functionality, consider installing a video management system (VMS). A VMS provides centralized management, monitoring, and recording of multiple cameras. It offers features such as video analytics, advanced search capabilities, and integration with other security systems. Choose a VMS that suits your specific needs and requirements.
Upgrading to Advanced Features
If you find that your surveillance needs have evolved, consider upgrading to cameras with advanced features and technologies. This may include cameras with higher resolutions, wider dynamic range, or intelligent video analytics. Stay up to date with the latest advancements in surveillance technology and consider upgrading your system to take advantage of new features that enhance the effectiveness and efficiency of your surveillance efforts.
By following this beginner’s guide, you can confidently choose, install, and manage an outdoor surveillance system that meets your specific needs. Remember to consider your surveillance purpose, determine the desired coverage area, select the appropriate camera type, and decide on wired or wireless cameras. Ensure proper camera placement, consider the line of sight, use multiple camera angles, and ensure adequate lighting. Prepare for installation by checking local laws, ensuring sufficient power supply, considering weatherproofing options, and selecting the right mounting equipment. Install the surveillance system by mounting the cameras, connecting them to power, running video cables, and positioning and adjusting the cameras. Set up network and remote access, configure camera settings, secure and maintain the system, monitor and manage the surveillance system, troubleshoot common issues, and enhance the outdoor surveillance system. With the right knowledge and careful planning, you can enjoy the peace of mind that comes from a well-designed and effective outdoor surveillance system.