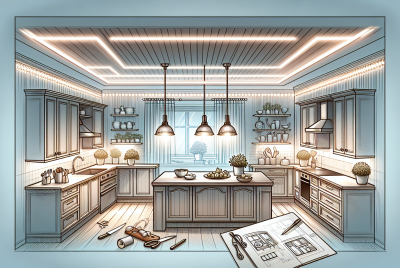
Beginner’s Guide To Installing Under Cabinet Kitchen Lighting

Are you tired of your kitchen feeling dimly lit and lacking in ambiance? If so, we have just the solution for you: under cabinet kitchen lighting. In this beginner’s guide, we will walk you through the step-by-step process of installing this type of lighting in your kitchen. From choosing the right fixtures to positioning them correctly, we’ve got you covered. Say goodbye to dark countertops and hello to a beautifully illuminated workspace. Get ready to transform your kitchen and enhance your cooking experience with under cabinet kitchen lighting.

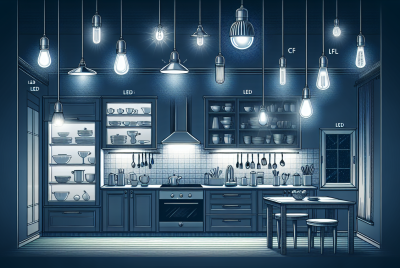
Choosing the Right Type of Under Cabinet Lighting
When it comes to under cabinet lighting, there are several options to choose from, depending on your specific needs and preferences. LED strip lights, puck lights, fluorescent lights, and linear lights are the most common types used for this purpose.
LED Strip Lights
LED strip lights are a popular choice for under cabinet lighting due to their versatility and energy efficiency. These lights come in long strips with adhesive backing, making them easy to install on the underside of cabinets. LED strip lights provide a bright and even illumination, illuminating the countertop area effectively.
Puck Lights
Puck lights are small, round fixtures that can be surface-mounted or recessed into the cabinets. They create a focused beam of light, perfect for highlighting specific areas on the countertop. Puck lights are ideal for creating task lighting in the kitchen, especially when you need focused lighting for food preparation or cooking.
Fluorescent Lights
Fluorescent lights are a cost-effective option for under cabinet lighting. They provide a bright and even light distribution, making them suitable for illuminating large countertops. It’s worth noting that fluorescent lights may require ballasts and can be bulkier compared to other options.
Linear Lights
Linear lights, also known as light bars or rigid strips, are long and rectangular fixtures that provide a linear source of light. They are easy to install and offer a clean, modern look. Linear lights are available in different lengths, allowing for customizable lighting solutions to fit any cabinet size.
Determining the Number of Lights Needed
Before proceeding with the installation, it’s crucial to determine the number of lights required for your under cabinet lighting project. Here are two important factors to consider:
Measuring the Length of the Cabinets
Measure the total length of the cabinets where you plan to install the lighting. This will give you an idea of how many linear feet of lighting you will need. Ensure that your measurements are accurate to avoid purchasing too few or too many lights.
Calculating the Spacing between Lights
To achieve optimal lighting, it’s essential to calculate the spacing between each light fixture. As a general rule of thumb, aim for an even spacing of 12 to 18 inches apart. However, this can vary depending on the specific lighting fixtures you choose and the desired level of brightness.
Gathering the Necessary Tools and Materials
To install under cabinet lighting, you’ll need a few tools and materials. Here’s a list of items you should have on hand:
Screwdriver
A screwdriver will be needed for attaching and securing the lighting fixtures.
Drill
A drill is necessary for creating holes if you choose to recess puck lights or for screwing in mounting brackets.
Measuring Tape
A measuring tape is essential for accurately measuring the length of your cabinets and calculating the spacing between lights.
Wire Strippers
Wire strippers are necessary for safely stripping the insulation off the wires during the installation process.
Lighting Fixtures
Depending on the type of lighting you choose, you’ll need the corresponding fixtures, such as LED strip lights, puck lights, or linear lights.
Wiring
Ensure you have the appropriate wiring to connect the lights and power supply.
Power Supply
Depending on the lighting system you select, you may need a power supply, such as a transformer or LED driver, to connect the lights to an electrical source.
Preparing the Cabinets for Installation
Before you begin the installation process, it’s essential to prepare your cabinets for the under cabinet lighting. Follow these steps to ensure a smooth and successful installation:
Clearing the Workspace
Remove any objects or obstructions from the countertops and cabinets to create a clear workspace. This will make it easier to maneuver and install the lighting fixtures.
Removing Cabinet Contents
Take out all the items stored within the cabinets so that you have easy access to the underside.
Cleaning the Underside of the Cabinets
Use a damp cloth or cleaning solution to thoroughly clean the underside of the cabinets. Removing any dirt or grease will ensure better adhesion of the lighting fixtures.
Marking the Installation Locations
Using a pencil or marker, mark the locations where you plan to install the lighting fixtures. This will serve as a guide during the installation process and ensure accurate placement.

Installing the Under Cabinet Lighting
Once the cabinets are prepared, it’s time to start installing the under cabinet lighting. Follow these steps for a successful installation:
Choosing the Starting Point
Select a starting point for the installation, usually located near an electrical outlet or power source. This will make it easier to connect the lighting fixtures to the power supply later on.
Securing the Power Supply
If using a power supply, secure it near the starting point according to the manufacturer’s instructions. Ensure the power supply is compatible with the lighting system you’ve chosen.
Wiring the Lights
If necessary, follow the manufacturer’s instructions to wire the lights together. Use wire connectors or electrical tape to securely connect the wires.
Mounting the Lighting Fixtures
Attach the lighting fixtures to the underside of the cabinets, following the manufacturer’s instructions. Use screws or adhesive pads, depending on the type of fixtures you’re using.
Connecting the Wiring to the Power Supply
Connect the wiring from the lighting fixtures to the power supply. If unsure, consult an electrician for guidance or hire a professional for the electrical connections.
Connecting to a Power Source
Once the lighting fixtures are installed, it’s time to connect them to a power source. Consider the following options:
Choosing the Power Source
Decide whether you’d like to connect the lighting fixtures to an existing outlet or hardwire them into the electrical system. Each option has its advantages and considerations, so choose the one that best suits your needs.
Using an Existing Outlet
If you choose to connect to an existing outlet, ensure it’s a dedicated circuit that can handle the additional load of the under cabinet lighting. Consider the positioning of the outlet relative to the lighting fixtures and the length of the power cord.
Hardwiring to the Electrical System
For a seamless and professional-looking installation, you can opt to hardwire the lighting fixtures into the electrical system. This may require the assistance of an electrician to ensure compliance with local electrical codes.
Testing and Adjusting the Lighting
Once the under cabinet lighting is connected to a power source, it’s time to test and adjust the lighting to your desired settings. Follow these steps:
Turning on the Lights
With caution, turn on the under cabinet lights using the switch or power supply. Ensure that all the lights illuminate properly.
Checking for Proper Functionality
Inspect each lighting fixture to ensure they are functioning correctly and providing the desired illumination. Make any necessary adjustments to the positioning or brightness to achieve the desired lighting effect.
Adjusting the Position or Brightness
If the lighting fixtures are not providing adequate illumination or if the position needs adjustment, make the necessary changes. Carefully reposition the fixtures or adjust the brightness settings if applicable.
Finishing Touches
With the under cabinet lighting installed and adjusted, it’s time to add the finishing touches to complete the project. Follow these steps:
Hiding the Wiring
If desired, conceal the wiring by routing it through channels or behind the cabinets. This will create a cleaner and more polished look.
Securing Loose Cables
Ensure all wires and cables are properly secured using zip ties or clips. This prevents them from hanging loosely and potentially becoming a safety hazard.
Reattaching Cabinet Contents
Carefully organize and place the items back into the cabinets, ensuring they are not obstructing the newly instalLED lighting fixtures.
Cleaning Up the Workspace
Remove any debris, packaging materials, or tools from the workspace. Clean and wipe down the countertops and cabinets to leave your kitchen looking tidy and well-maintained.
Maintenance and Troubleshooting
To keep your under cabinet lighting in optimal condition, regular maintenance and troubleshooting may be necessary. Here are some tips to consider:
Regular Cleaning
Regularly clean the lighting fixtures and remove any dust or dirt buildup. Use a soft, lint-free cloth or a mild cleaning solution to avoid damaging the fixtures.
Replacing Bulbs or Fixtures
Over time, bulbs may burn out or fixtures may become damaged. Follow the manufacturer’s instructions to safely replace any defective bulbs or fixtures.
Troubleshooting Common Issues
If you encounter any issues with your under cabinet lighting, such as flickering lights or inconsistent brightness, consult the manufacturer’s troubleshooting guide or seek assistance from a professional. It’s important to address any electrical issues promptly to ensure safety.
Safety Considerations
Working with electricity carries inherent risks, so it’s crucial to prioritize safety during the installation of under cabinet lighting. Consider the following safety precautions:
Turning Off the Power
Before starting any electrical work, turn off the power to the area where you’ll be installing the lighting. This can be done at the circuit breaker or by unplugging any connected power sources.
Avoiding Overloading Circuits
Ensure that the electrical circuit you are using can handle the additional load of the under cabinet lighting. Overloading circuits can lead to electrical issues or even a fire hazard. If unsure, consult an electrician.
Properly Insulating and Securing Wires
When wiring the lighting fixtures, ensure that the wires are properly insulated to avoid any potential electrical shock or short circuits. Secure all wires and cables using appropriate fasteners to prevent them from becoming a safety hazard.
By following these installation and safety guidelines, you can successfully install under cabinet lighting in your kitchen, enhancing both the functionality and aesthetic appeal of your space. Enjoy the benefits of a well-lit kitchen where your culinary creations can truly shine!