Beginner’s Guide To Installing A Chandelier

So, you’ve decided to add a touch of elegance and sophistication to your space by installing a chandelier. But where do you even begin? Fear not, my friend, because this article serves as your comprehensive guide to successfully installing a chandelier, even if you’re a complete beginner. From choosing the perfect location to ensuring the right electrical connections, we’ll walk you through each step with clear instructions, helpful tips, and a friendly tone. By the end of this guide, you’ll be ready to bask in the radiant glow of your newly installed chandelier.

Overview
Selecting the right chandelier
When it comes to selecting the right chandelier for your home, there are a few factors to consider. First, think about the size of the room where you’ll be installing the chandelier. You want to choose a chandelier that is proportional to the space and doesn’t overwhelm the room. Additionally, consider the style and design of the chandelier. You want it to complement the existing decor and enhance the overall aesthetic of the room.
Gathering necessary tools and materials
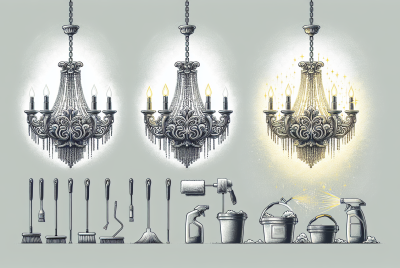
Before you begin the installation process, it’s important to gather all the necessary tools and materials. Some of the tools you’ll need include a ladder or platform, wire strippers, screwdrivers, pliers, and a voltage tester. In terms of materials, you’ll need a chandelier, a mounting bracket, wire connectors, and light bulbs.
Preparing the installation area
Prior to installing the chandelier, it’s important to prepare the installation area properly. Clear any furniture or obstructions from the area to create a safe and spacious working environment. Lay down a drop cloth or old sheet to protect the floor from potential damage. It’s also a good idea to turn off any fans or HVAC systems to avoid creating a draft that could sway the chandelier during installation.
Step 1: Turn off the power
Locate the circuit breaker
The first step before starting any electrical work is to locate the correct circuit breaker. You can usually find a circuit breaker box in your basement, garage, or utility room. Look for a breaker that is labeled for the specific room where you’ll be installing the chandelier.
Switch off the power to the room
Once you’ve located the correct circuit breaker, flip the switch to the “off” position to cut off the power supply to the room. This step is crucial for your safety and to prevent any electrical accidents during the installation process. Double-check that the power is off by testing the existing light switch or using a voltage tester.
Step 2: Prepare the mounting bracket
Remove the old fixture
If you’re replacing an existing light fixture with a chandelier, start by removing the old fixture. Turn off the light switch and use a screwdriver to loosen and remove the screws holding the fixture in place. Carefully detach the wires and set aside the old fixture for disposal.
Install the mounting bracket
Once the old fixture is removed, it’s time to install the mounting bracket for your chandelier. Follow the manufacturer’s instructions to securely attach the bracket to the ceiling using screws. The mounting bracket will provide a stable base for your chandelier and ensure proper support.
Step 3: Connect the wires
Identify the wires
Before connecting the wires of your new chandelier, it’s important to identify the different wires. There are typically three wires: black (hot), white (neutral), and green or copper (ground). Familiarize yourself with the wire colors and their corresponding functions to ensure a proper connection.
Strip the ends of the wires
Using wire strippers, carefully remove about half an inch of insulation from the ends of the wires. Make sure to strip the wires evenly and avoid cutting into the actual wire. This will expose the metal conductors and allow for a secure connection.
Connect the wires
With the ends of the wires exposed, connect them to their corresponding counterparts. Twist the black wire from the chandelier to the black wire from the electrical box and secure them together with a wire connector. Repeat this process for the white wires and the ground wires. Double-check that all connections are tight and secure before proceeding.

Step 4: Attach the chandelier
Attach canopy or cap to the ceiling
Depending on the design of your chandelier, you may need to attach a canopy or cap to the ceiling to conceal the wiring and mounting bracket. Follow the manufacturer’s instructions to safely secure the canopy or cap in place using screws or other provided hardware.
Hang the chandelier
With the canopy or cap in place, it’s time to hang the chandelier. Lift the chandelier carefully and align the mounting bracket with the corresponding slots or hooks on the chandelier. Once aligned, gently slide the chandelier onto the bracket until it is secure. Use a screwdriver or any provided hardware to tighten any screws or bolts that hold the chandelier in place.
Step 5: Install light bulbs
Check wattage compatibility
Before installing the light bulbs, it’s important to check the wattage compatibility of your chandelier. Each chandelier has a maximum wattage rating, so make sure the light bulbs you choose do not exceed this limit. Using bulbs that have a higher wattage than recommended can lead to overheating and potential damage.
Install light bulbs
Once you’ve determined the appropriate wattage, it’s time to install the light bulbs. Carefully screw each bulb into its respective socket, ensuring a secure fit. Take extra caution not to overtighten the bulbs, as this can cause the glass to crack or break. Once all the bulbs are installed, double-check that each one is working properly.
Step 6: Test the chandelier
Turn on the power
Now that the installation is complete, it’s time to turn on the power and test the chandelier. Go back to the circuit breaker and flip the switch to the “on” position, restoring power to the room.
Check if the chandelier works
After turning on the power, go to the chandelier’s corresponding light switch or use the remote control (if applicable) to turn on the lights. Check if the chandelier is working as expected and if all the bulbs are illuminated. If any issues arise, double-check the connections and retest.
Safety Tips
Turn off power before starting
Before starting any electrical work, it’s essential to turn off the power to the room or area where you’ll be working. This precaution ensures your safety and prevents electrical shocks or accidents. Always locate the correct circuit breaker and double-check that the power is off before proceeding with any installation or repair.
Use a ladder or platform
When installing a chandelier, it’s important to use a ladder or platform to safely reach the installation area. Avoid standing on furniture or unstable surfaces, as this can lead to falls or injuries. Make sure the ladder or platform is placed on a flat and stable surface, and always follow proper ladder safety guidelines.
Get assistance if needed
Installing a chandelier can be a challenging task, especially if you’re not familiar with electrical work. If you feel unsure or uncomfortable, don’t hesitate to seek assistance from a professional electrician. They have the knowledge and experience to ensure a safe and proper installation.
Common Mistakes to Avoid
Not checking weight capacity
One common mistake is failing to check the weight capacity of the mounting bracket and ceiling. Chandeliers vary in size and weight, and not all ceilings are designed to support heavy lighting fixtures. Make sure to carefully read the specifications of both the chandelier and the mounting bracket to ensure they are compatible and can safely support the weight.
Incorrectly wiring the chandelier
Another mistake to avoid is incorrectly wiring the chandelier. Improper wiring can lead to electrical issues, such as short circuits or fires. Always follow the manufacturer’s instructions and double-check your connections before restoring power to the room.
Skipping proper grounding
Proper grounding is crucial for the safe operation of your chandelier. Skipping this step can increase the risk of electrical shocks or damage to the fixture. Make sure to connect the ground wire from the chandelier to the corresponding ground wire in the electrical box, following all safety guidelines and regulations.
Maintenance and Care
Regular dusting and cleaning
To keep your chandelier looking its best, it’s important to regularly dust and clean it. Use a soft, dry cloth or a feather duster to remove any dust or dirt that may accumulate on the surface. Avoid using water or harsh cleaning chemicals, as this can damage the chandelier’s finish. If necessary, consult the manufacturer’s instructions for specific cleaning recommendations.
Replacing burnt-out bulbs
Over time, bulbs in your chandelier may burn out and need replacement. When replacing bulbs, make sure to turn off the power and allow the bulbs to cool down before handling them. Gently unscrew the burnt-out bulbs and replace them with new ones of the appropriate wattage. Remember to never exceed the recommended wattage to avoid any potential damage to the chandelier.